Contents
- 1 Getting Started with Pionex Signal Bot
- 2 Step 1. Configuring the “Signal” in Pionex
- 3 Step 2. Add a strategy script to the TradingView chart
- 4 Step 3. Configuring the strategy alert on TradingView to connect with Pionex “Signal”
- 5 Step 4. Creating the Signal bot in Pionex with the linked signal from TradingView
- 6 Step 5. Checking if the TradingView signal is sent properly in Pionex
- 7 Step 6. How to add a custom indicator into the strategy script for the Signal bot
Getting Started with Pionex Signal Bot
- You will need a Pionex account to execute the trades. Create Your Free Pionex Account Today!
- You will need a TradingView account with at least an Essential subscription for Alert and Webhook URL access. Register a TradingView account now
- Desktop browser to access the TradingView Pinescript Editor and Signal bot configuration page.
Step 1. Configuring the “Signal” in Pionex
- Log in to your Pionex account (http://www.pionex.com)
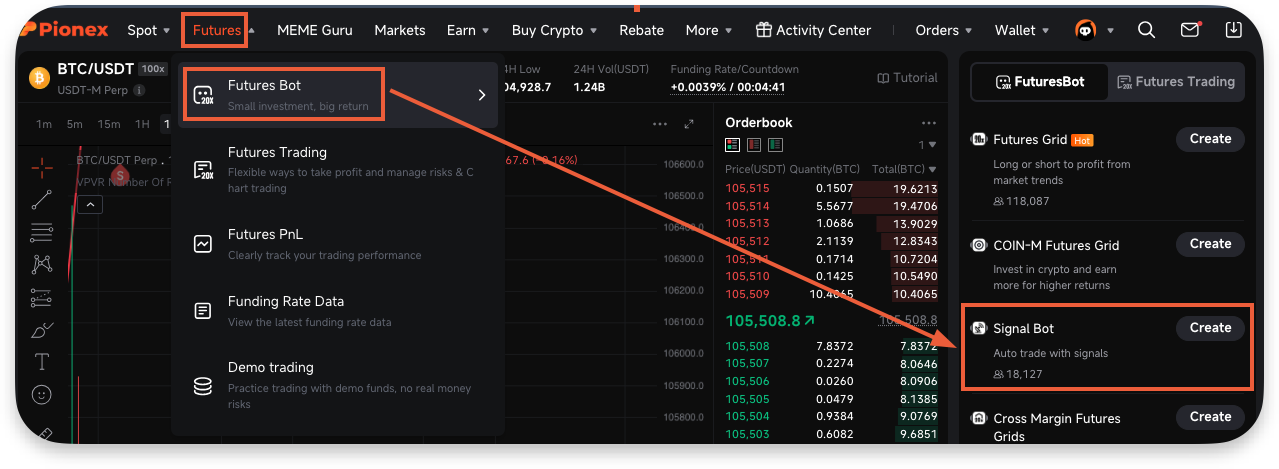
- Navigate to Futures → Futures Bot → Signal Bot
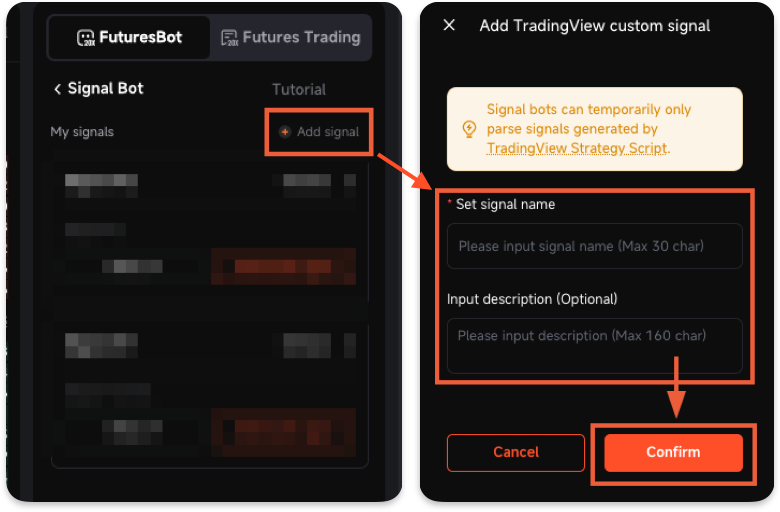
- Click on the “Add signal” button and set the name and description for this signal and then click “Confirm”
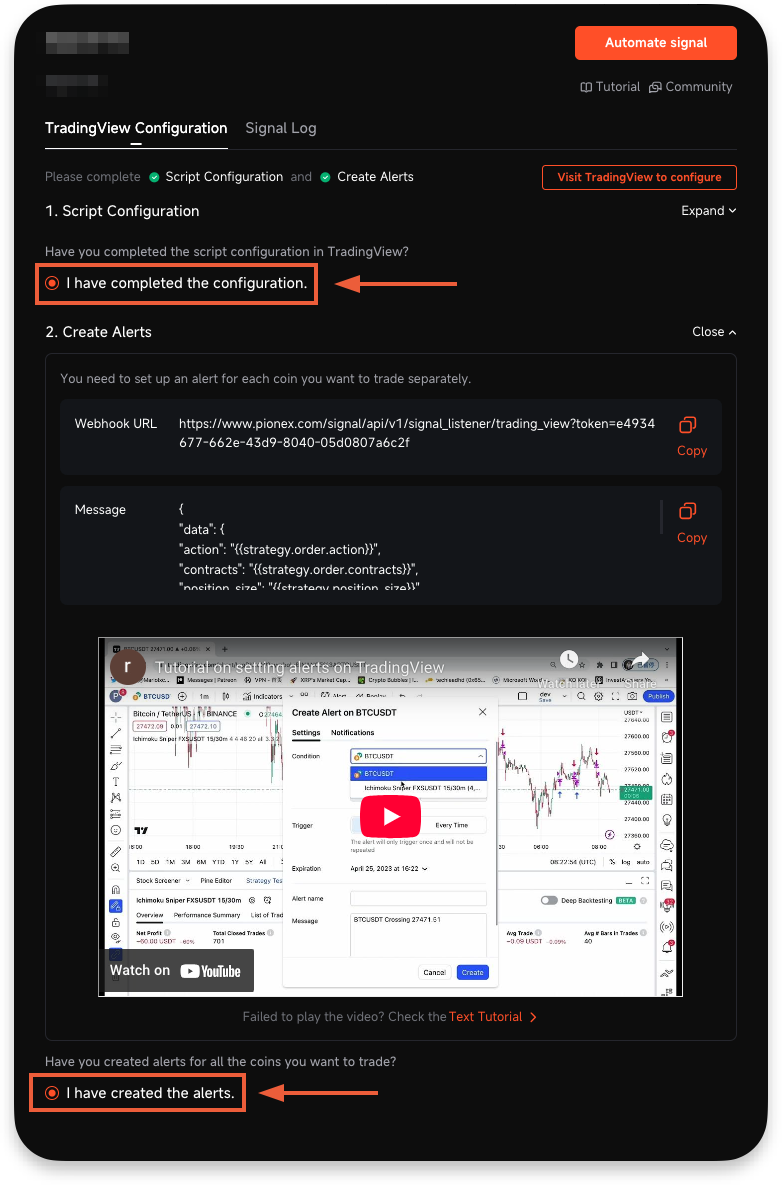
- Once the signal has been created, directly click on the “I have completed the configuration” and “I have created the alert”
- Signal setup on Pionex has been completed.
Step 2. Add a strategy script to the TradingView chart
- Log in to your TradingView account (http://www.tradingview.com/chart)
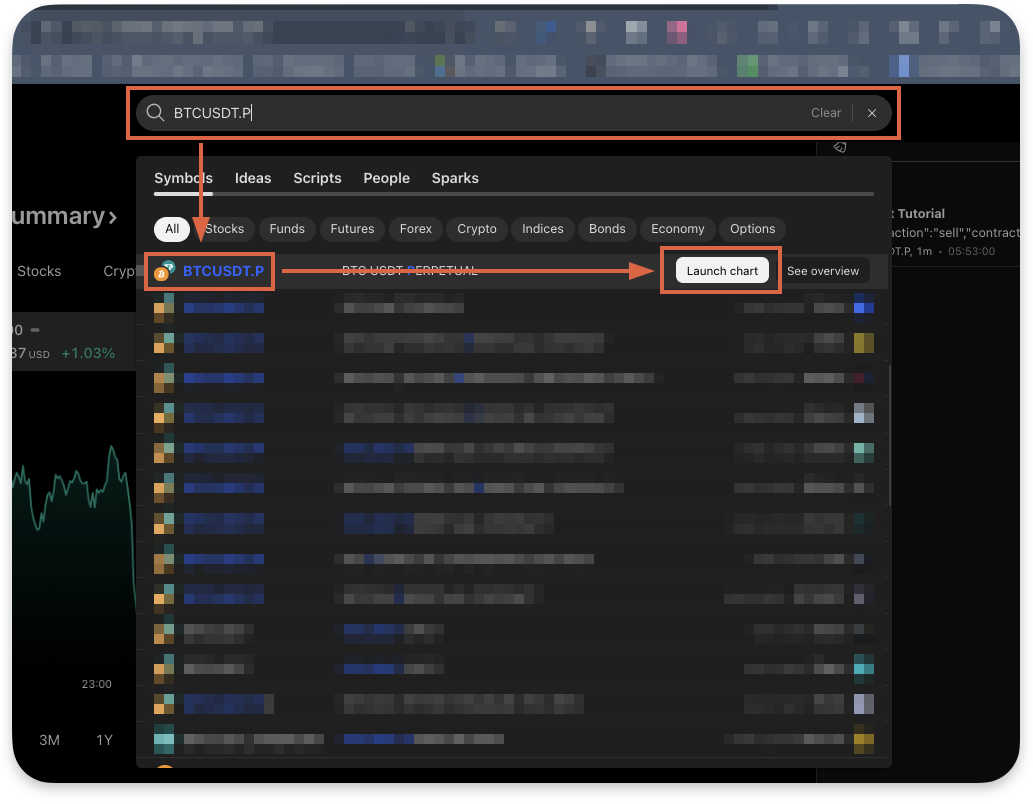
- Choose the desired trading pair under Pionex, and click the “Launch chart“ button
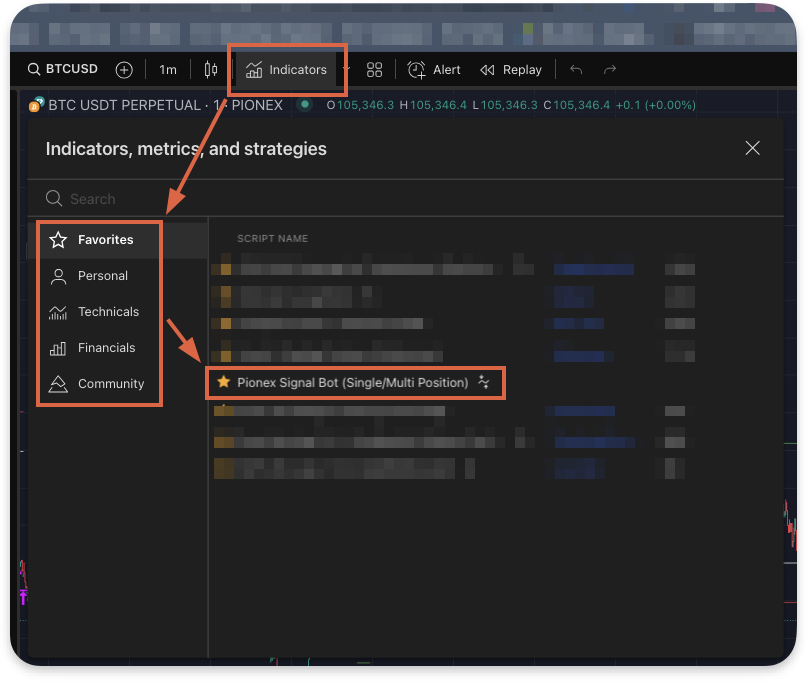
- Click “Indicators”, select the Signal bot script you want to use
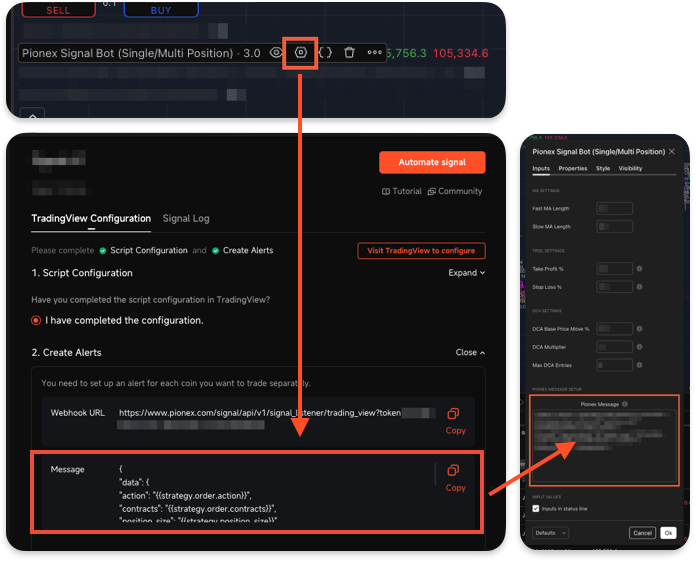
- Click the “Gear” icon to open the strategy settings, on the “Input” tab, copy the “Message” from Pionex into the “Pionex Message” textbox
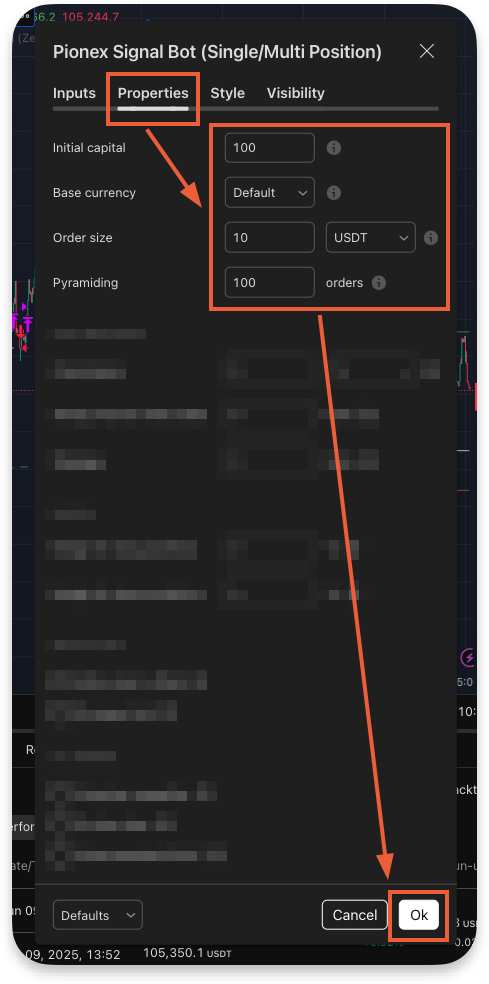
- On the “Properties” settings, refer to the recommended settings as follows:
- Initial capital: Keep this value at “100”
- Base currency: Keep this value at “Default”
- Order size: 1 ~ 100 USDT. Keep the value within 1 to 100 USDT.
“50” USDT will be translated as 50% fund utilization of the Signal bot - Pyramiding: 1 ~ any value. This value is for multi-position entry settings
- Margin for long positions: Keep this value at “0”
- Margin for short positions: Keep this value at “0”
- Other parameters can be ignored as it doesn’t impact the configuration.
- Strategy configuration in the TradingView chart has been completed.
Step 3. Configuring the strategy alert on TradingView to connect with Pionex “Signal”
- Log in to your TradingView account (http://www.tradingview.com/chart)
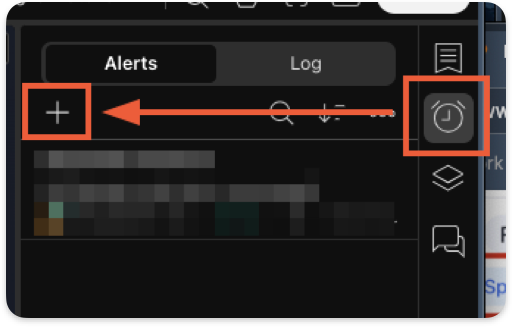
- Click on the “Alarm” icon on the upper right corner, and click the “+” icon to create a new alert
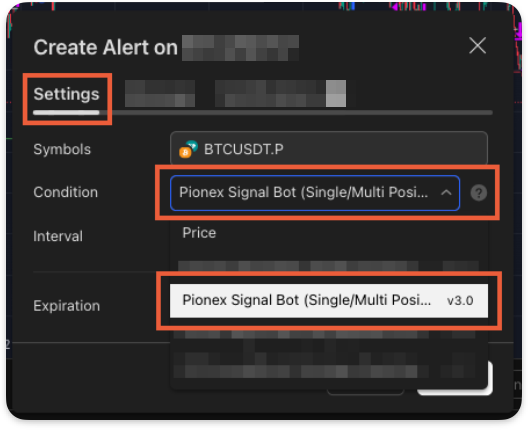
- In the “Settings” tab, choose the desired strategy from the list.
Note: the latest configuration will be at the bottom of the list and needs to be updated every time there are changes to the strategy “Input” configuration.
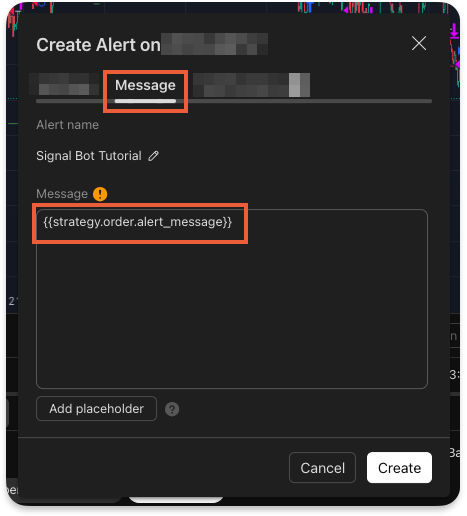
- In the “Message” tab, keep the value unchanged as the default content.
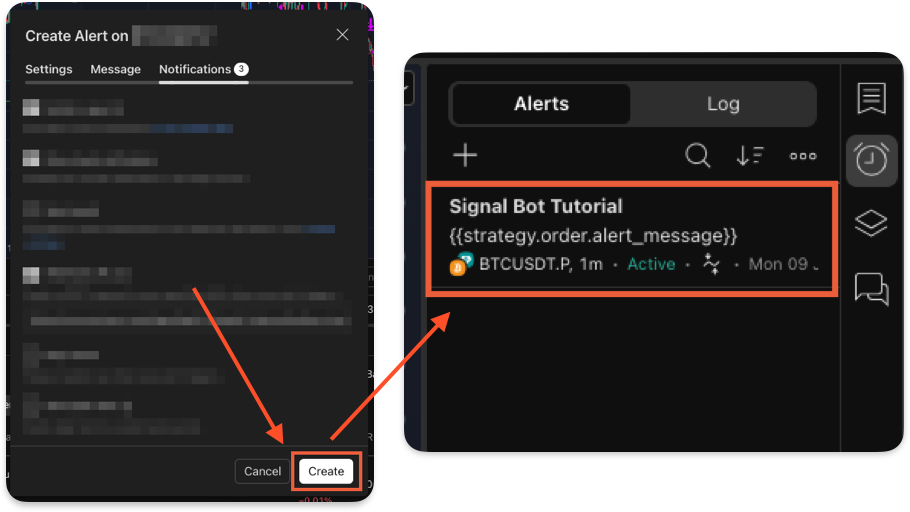
Note: the content will produce the “Message” as a JSON code for the trading instruction. - In the “Notification” tab, enable the “Webhook URL” and paste the “Webhook URL” from Pionex into the “Webhook URL” in TradingView
- Click the “Create” button to complete the setup, and the alert will appear in the “Alert” list
- Strategy Alert configuration in the TradingView chart has been completed.

Step 4. Creating the Signal bot in Pionex with the linked signal from TradingView
- Log in to your Pionex account (http://www.pionex.com)
- Navigate to Futures → Futures Bot → Signal Bot

- On the “Signal Bot” page, click the “Automate signal” to configure the bot settings, and then click the “Create the bot”
- Creating the Signal bot in Pionex has been completed.

Step 5. Checking if the TradingView signal is sent properly in Pionex
- Log in to your TradingView account (http://www.tradingview.com/chart)
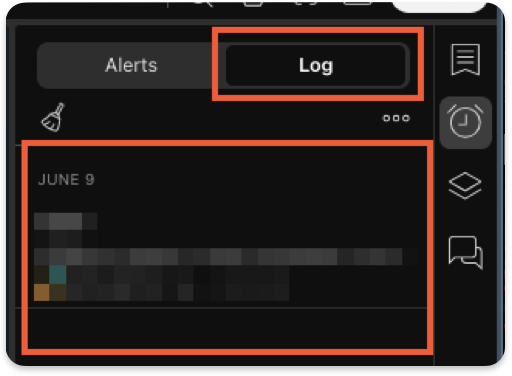
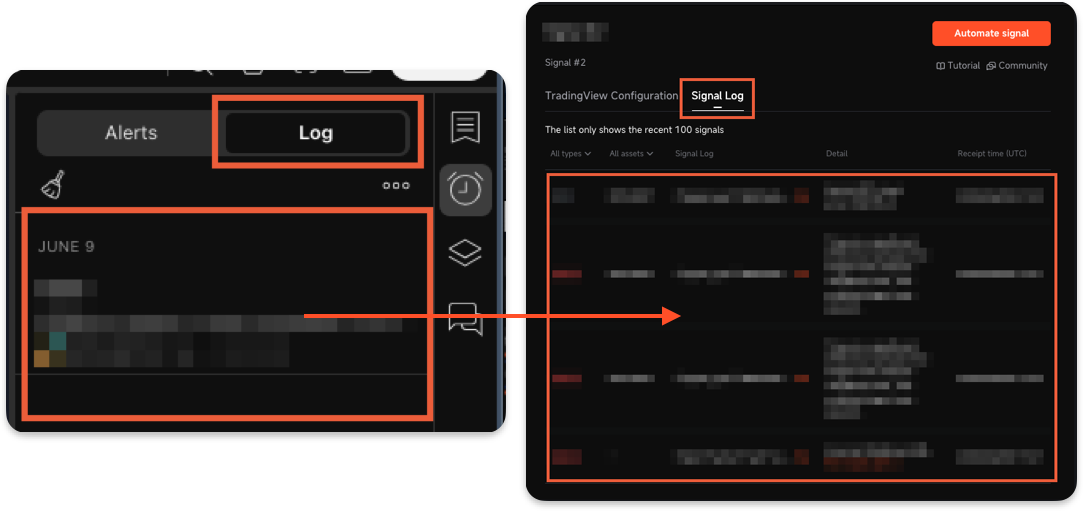
- Click on the “Alarm” icon in the upper right corner, and click the “Log” tab to check the list
- Log in to your Pionex account (http://www.pionex.com)
- Click on “Details” and then navigate to the “Signal Log” tab
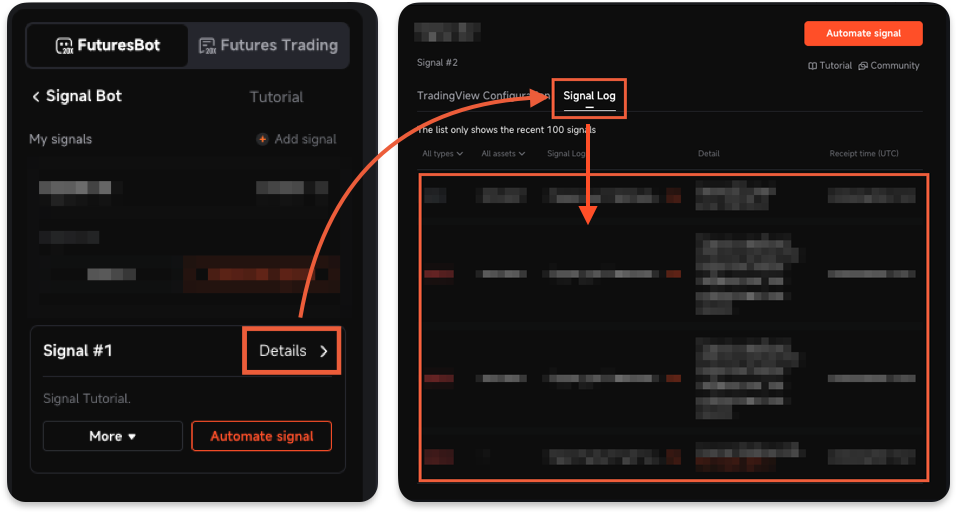
- Compare the TradingView Alert log with the Pionex Signal Log to ensure the signals are received properly
- Use the “Signal Message Calculator” to translate the Message content into an easier-to-understand format.
Step 6. How to add a custom indicator into the strategy script for the Signal bot
- Log in to your TradingView account (http://www.tradingview.com/chart)
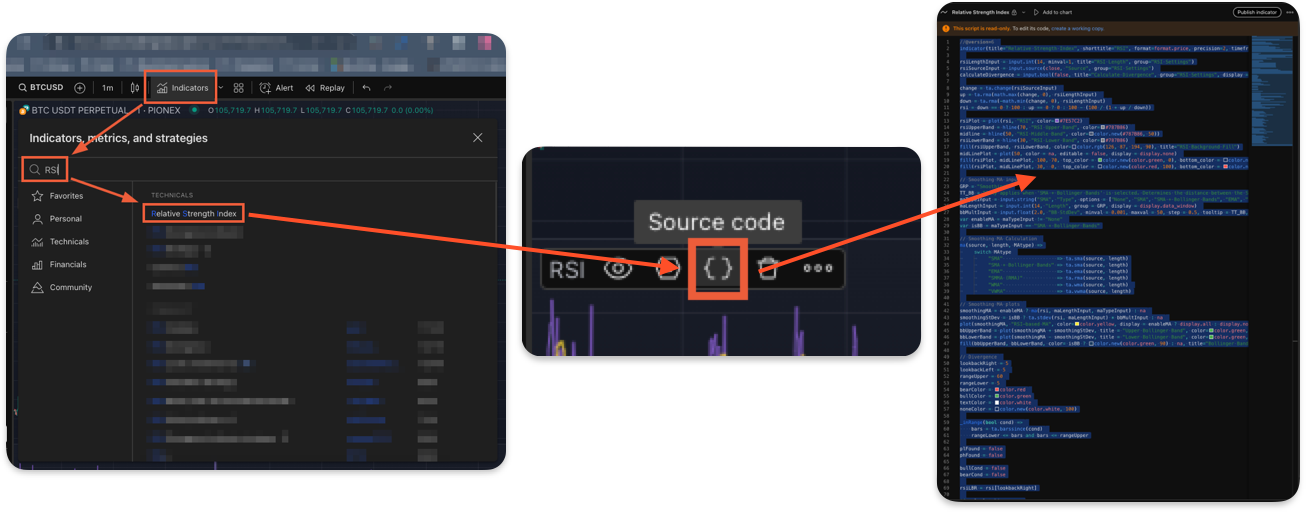
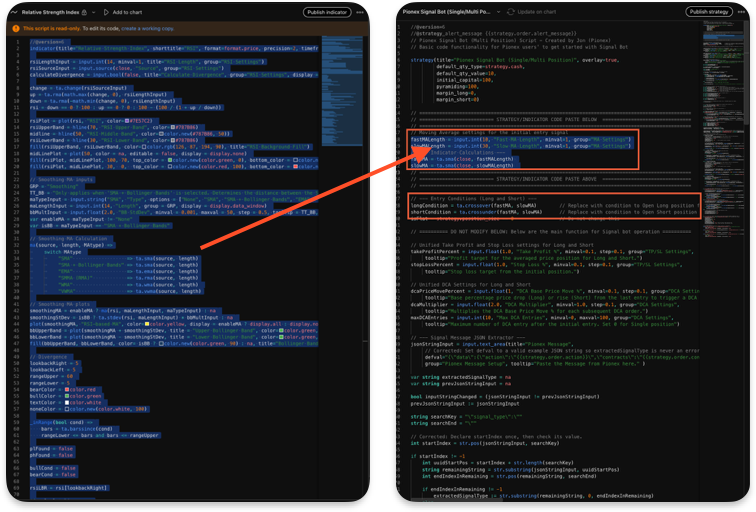
- Obtain the open-source indicator, such as “RSI”, into the TradingView chart, and copy the source code
- Open the Pionex Signal bot strategy script, which has been optimized specifically for Pionex
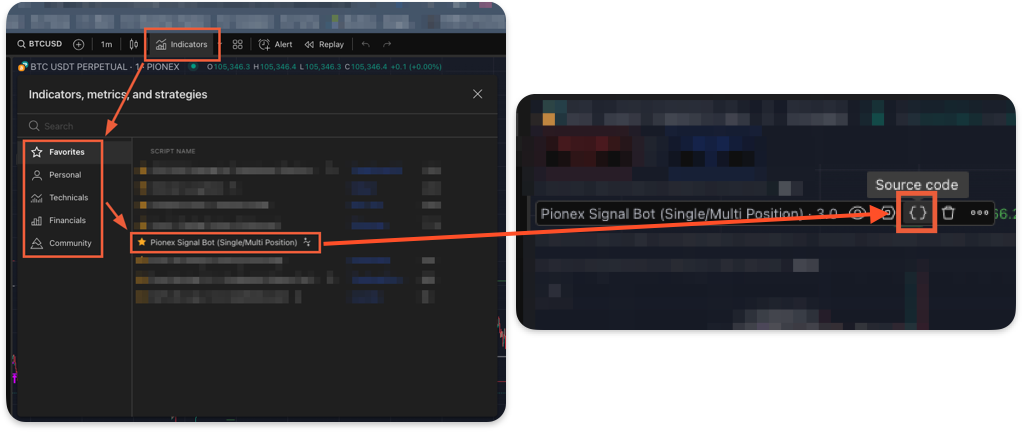
- Paste the custom indicator source code into the specific section for the indicator in the Pionex Signal bot strategy script
- Define the conditions for “Long” and “Short” from the custom indicator into the “longCondition” and “shortCondition” variables
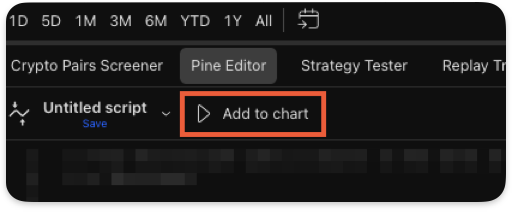
- Click the “Add to chart” or “Update on chart” button to complete the script configuration
- Integrating a custom indicator into the Pionex strategy script has been completed.

Join Pionex Signal Bot community: t.me/pionexapi
