How to open futures account in Pionex
First, you need to log in to pionex.com, and then you can follow the tutorial below for APP version.
- Click ‘Futures’
2. Click ‘Enable Futures Trading’
3. Click ‘Enable Futures Account’

4. Select ‘I accept Futures Account agreement’
5. Click ‘Confirm’

6. Click ‘confirm’ to finish

If you are using the web version, you can refer to the tutorial below for guidance.
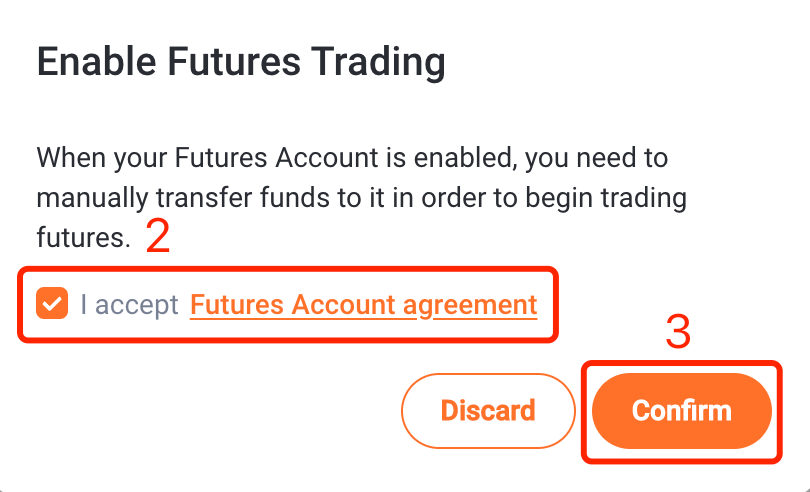
- Click ‘Enable Futures Trading’

2. Select ‘I accept Futures Account agreement’
3. Click ‘Confirm’ to finish