Contents
Getting Started with Pionex Signal Bot
- You will need a Pionex account to execute the trades. Create Your Free Pionex Account Today!
- You need to prepare an OpenAPI Key and implement a signal-sending program based on the Signal OpenAPI.
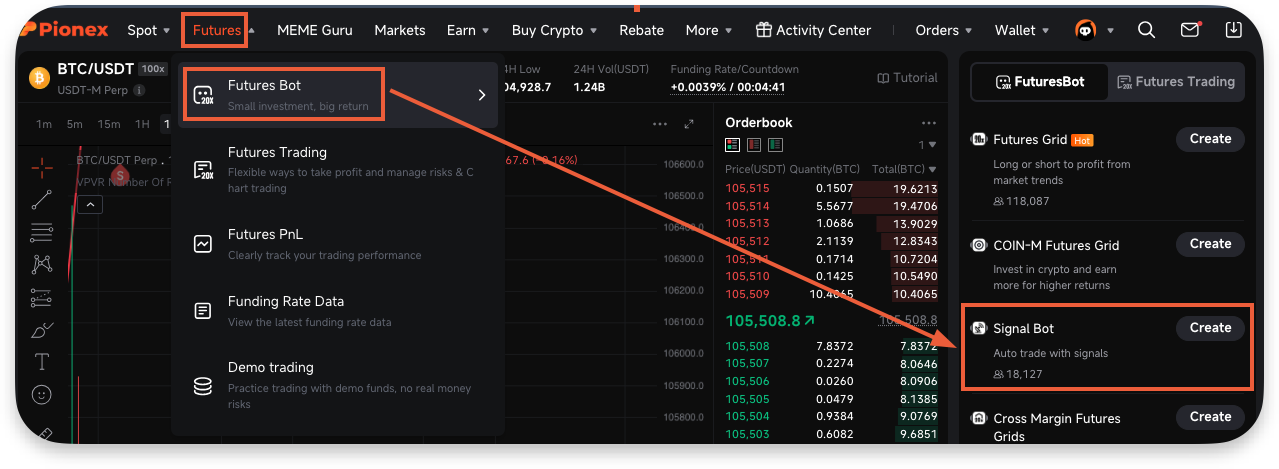
Step 1. Configuring the “Signal” in Pionex
- Log in to your Pionex account (http://www.pionex.com)
- Navigate to Futures → Futures Bot → Signal Bot
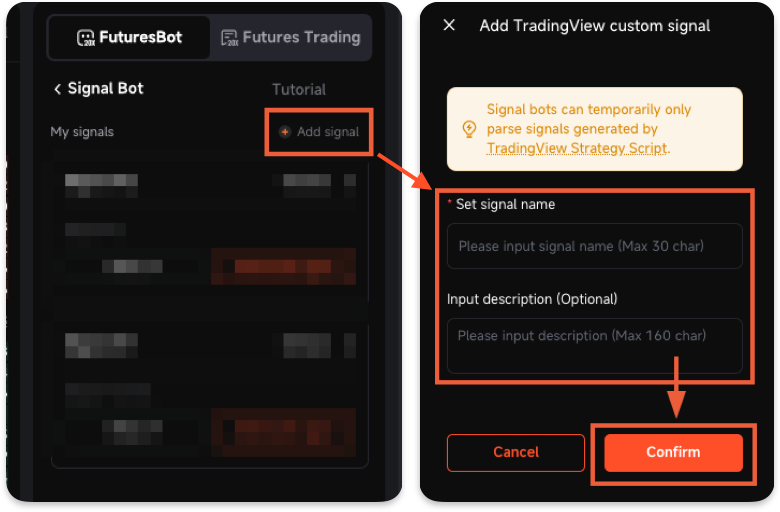
- Click on the “Add signal” button and set the name and description for this signal and then click “Confirm”
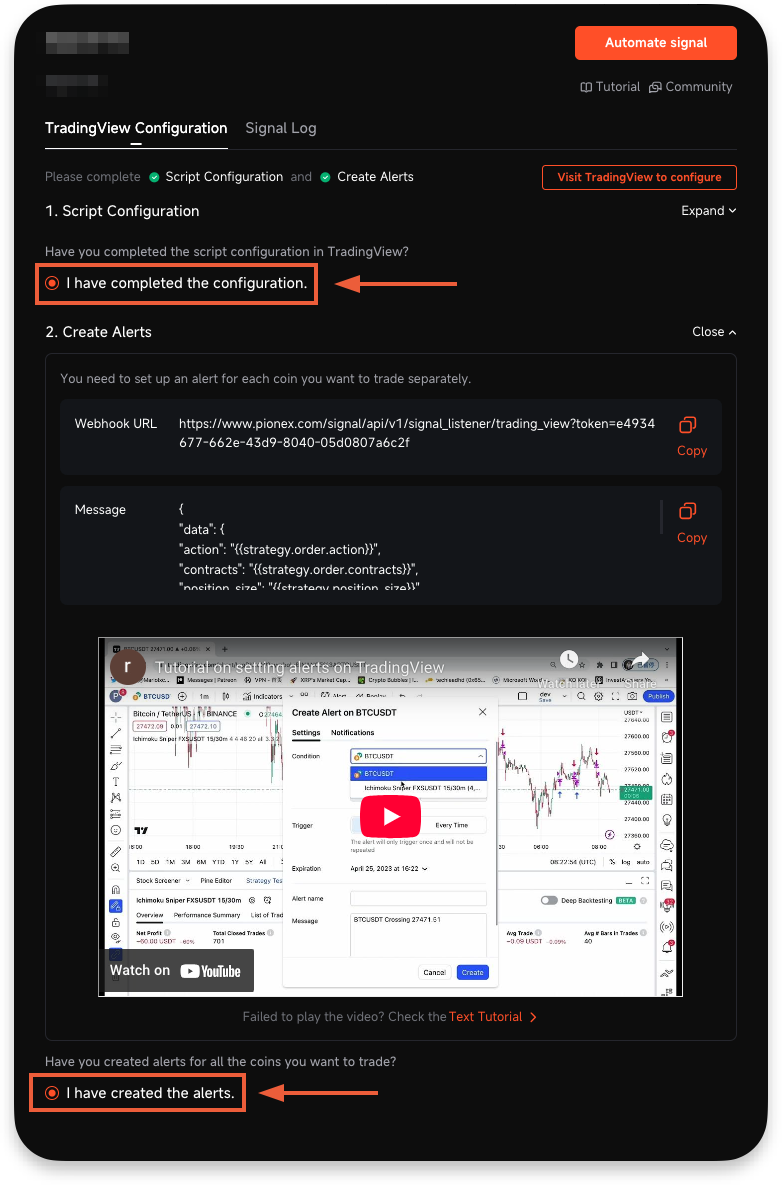
- Once the signal has been created, directly click on the “I have completed the configuration” and “I have created the alert”
- Signal setup on Pionex has been completed.
Step 2. Implement a signal-sending program via the Signal OpenAPI.
- Create an OpenAPI key: https://www.pionex.com/en/my-account/api
- Refer to the Signal OpenAPI documentation to implement a program that sends signals: https://www.pionex.com/docs/api-docs/bot-api/signal
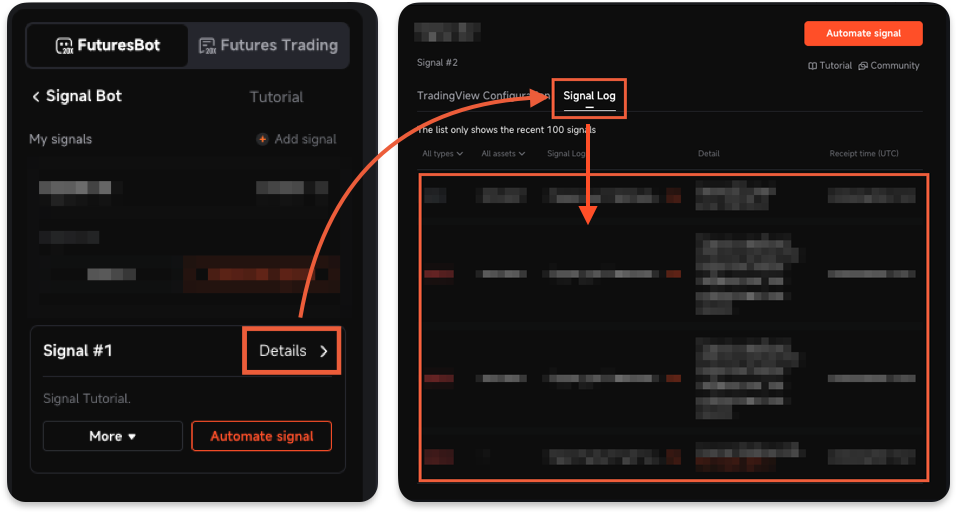
- Test your program and visit the signal log page to confirm that the sent signals are received correctly.
Step 3. Creating the Signal bot in Pionex with the linked signal from TradingView
- Log in to your Pionex account (http://www.pionex.com)
- Navigate to Futures → Futures Bot → Signal Bot

- On the “Signal Bot” page, click the “Automate signal” to configure the bot settings, and then click the “Create the bot”
- Creating the Signal bot in Pionex has been completed.

Join Pionex Signal Bot community: t.me/pionexapi
