The Pionex Signal Bot is launched now! If you use trading signals to trade crypto, now you can add your TradingView signals to Pionex Signal Bot for signal trading. Adding signals is divided into three steps as follows:
Step 1: Set the signal name
Step 2: Modify the default of your signal script on TradingView
Step 3: Set up Signal Push on TradingView
Contents
Set the signal name
Just set a name for your signal as a mark for easy recording and identification.
Modify the default of your signal script on TradingView
Step 1: Log in to your TradingView
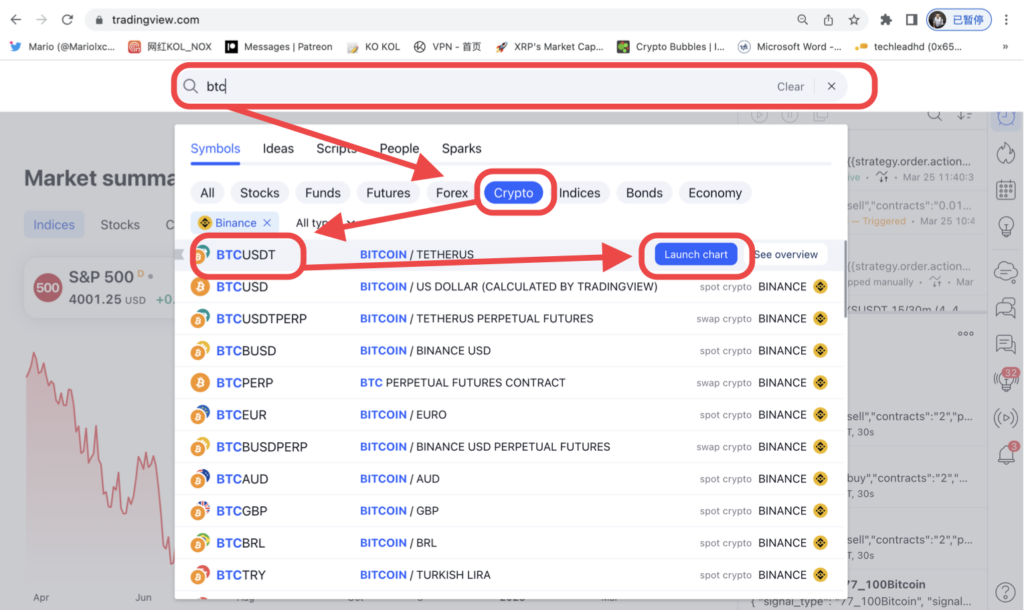
Step 2: Choose a trading pair at random, take the BTC/USDT as an example, and click “Launch Chart“


Step 3: Click “Indicators”, select the signal you want to use in “My scripts”


Step 4: Click the gear icon, set the parameters as shown in the figure in the “Properties” and “Save as default”, click “OK”
“IMPORTANT: When entering the Order Size, make sure to enter 100 USD. This value must remain unchanged. (otherwise Pionex will not be able to receive your signals correctly)
You can determine your investment by setting up on Pionex”


Set up Signal Push on TradingView
Step 1: Select the trading pair you want the trade with the signal. (Please note: choose the USDT spot trading pairs on other exchanges)


Step 2: Click “Alert”, and select your trading signal on the “Setting” page. Paste the message you copied from Pionex in the “Message”.


Step 3: Choose the Webhook URL in “Notification”. Paste the webhook URL copied from Pionex to TradingView then click “Create”


